We thoroughly assess all products before recommending them. We may be compensated if you choose to buy through links on our site.
Question: How to Make Lip Liner Look More Natural?
Answer: To make lip liner look more natural, choose a liner matching your natural lip tone. Apply with soft, feathery strokes and then blend the line inward with a finger or brush. This diffuses any harsh edges for a subtle, more believable definition.
Achieving an Undetectable Lip Line
I have seen countless makeup trends come and go. One constant, however, is the desire for a perfectly defined yet natural-looking lip. Lip liner is a powerful tool in any makeup arsenal. It can define your lip shape, prevent lipstick from bleeding, and make your lip color last all day. The challenge many people face is how to make lip liner look more natural. A harsh, obvious line can date your look and detract from your overall appearance. The goal is to enhance your lips subtly, creating definition that looks like it belongs there.
You do not need to be a professional makeup artist to master this skill. The secret lies in a combination of the right products, a bit of preparation, and a few simple techniques. We will explore how to select the perfect shade that complements your natural lip tone. We will also cover the essential steps to prepare your lips for a smooth application. With these tips, you can transform your lip liner from a noticeable outline into a seamless foundation for your favorite lip color. Get ready to redefine your lip game for a flawlessly natural finish.

Best Lip Liner
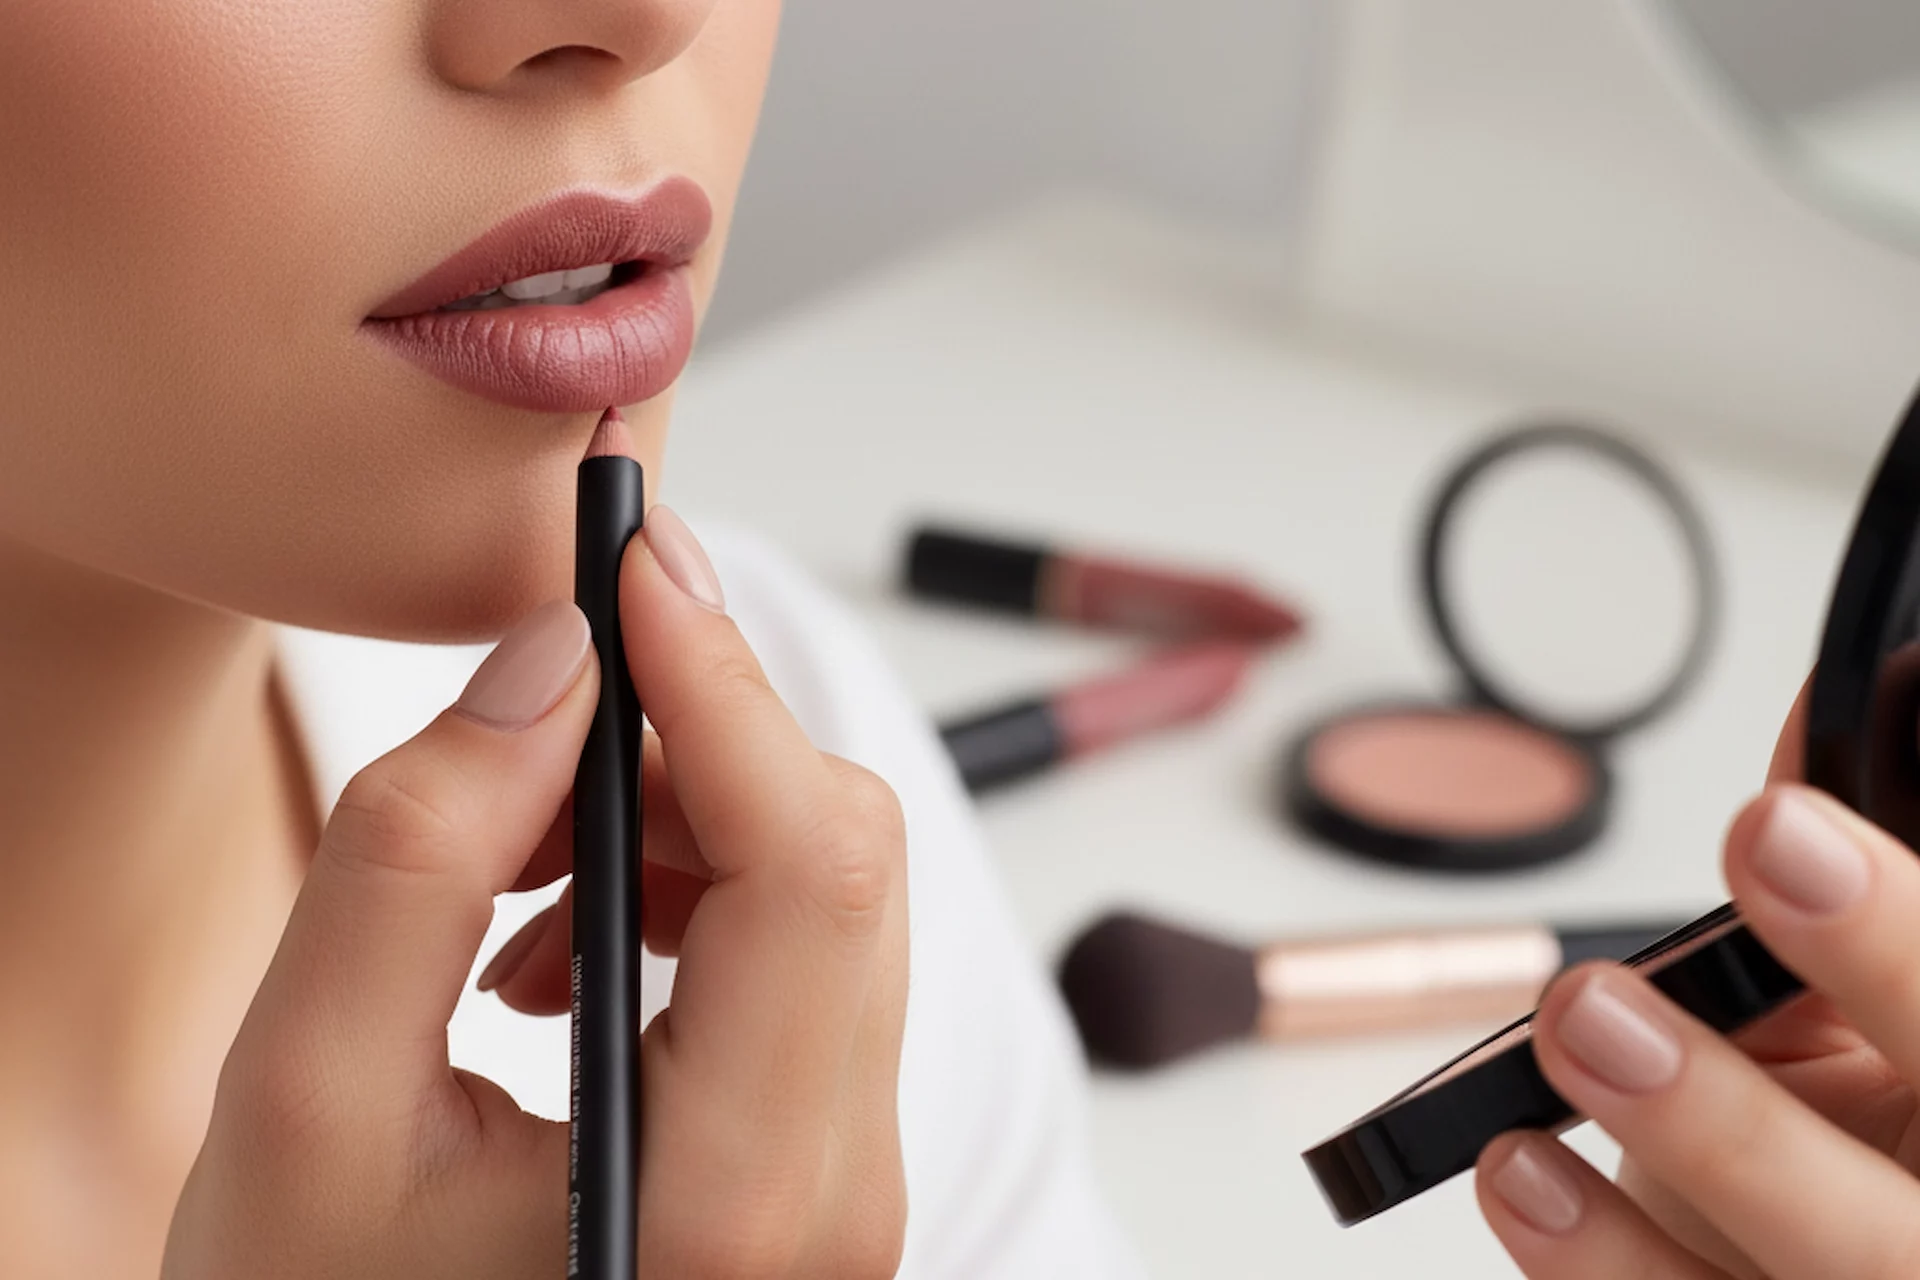
Lip Liner
From gentle toning to intense color correction, these lip liners offer targeted solutions for blonde and highlighted hair...
Selecting the Ideal Shade and Formula
The first step to a natural-looking lip line is choosing the right product. The color you select is incredibly important. A common mistake is matching your liner to your lipstick color. Instead, you should choose a liner that is one to two shades deeper than your natural lip color. This approach creates a soft shadow effect, which adds dimension and definition without a stark contrast. To find your perfect match, test shades on the back of your hand or, if possible, directly on your lip line in the store. Look for a color that almost disappears into your lips but provides a hint of depth.
The formula of your lip liner also plays a significant role. You want a pencil that is creamy enough to glide on smoothly without tugging at your skin. A dry, hard pencil can create a skipped, uneven line that is difficult to blend. A creamy formula allows for more control and a softer application. Look for liners with ingredients like vitamin E or jojoba oil, which nourish the lips while providing lasting color. These formulas are more forgiving and blend easily, which is essential for a natural finish. A softer pencil makes the entire process easier and yields better results.
Related Article: How to Find Your Perfect Shade of Lip Liner?
Related Article: Are You Supposed to Put Lip Liner All Over Your Lips?
Preparing Your Lips for Flawless Application
Great makeup starts with a great canvas. This principle is especially true for your lips. Before you even pick up your lip liner, you must ensure your lips are smooth and hydrated. Dry, flaky lips will cause the liner to catch and appear patchy. The color will cling to dry spots, creating an uneven and unnatural texture. A simple lip scrub can make a world of difference. You can use a store-bought scrub or make your own with sugar and a bit of coconut oil. Gently massage the scrub onto your lips in a circular motion to slough away dead skin cells.
After exfoliating, hydration is the next critical step. Apply a nourishing lip balm and let it absorb for a few minutes. This plumps up your lips and creates a smooth surface for the liner to glide over. If you apply liner directly to dry lips, it can look severe and settle into fine lines. After the balm has absorbed, you can gently blot any excess with a tissue. Some makeup artists even apply a light layer of foundation or concealer over the lips. This step can neutralize your natural lip color, making the liner and lipstick appear more true to their shade and helping them last longer.
Application Method
The way you apply your lip liner is just as important as the product you choose. A heavy hand is the fastest way to an unnatural look. You want to use light, feathery strokes instead of drawing one continuous, hard line. This technique gives you more control and creates a softer, more diffused edge. Hold the pencil at a slight angle to your lips, not straight on. This uses the side of the pencil tip rather than the very point, which also contributes to a softer application. A sharp pencil is your best friend here, as it allows for precision without requiring excess pressure.
Starting Point and Shape
Begin your application at the Cupid’s bow, which is the double curve on your upper lip. Create a small ‘X’ shape to define this area perfectly. This provides a symmetrical starting point. From there, use short, light strokes to trace the natural line of your upper lip, moving from the center outwards to each corner. Repeat this process on your bottom lip, starting in the very center and working your way out. If you wish to slightly overline your lips for a fuller appearance, do so with extreme subtlety. Trace just outside your natural lip line, focusing only on the center of the top and bottom lips. Avoid overlining the corners, as this can look unnatural and droopy.
Lip Liner Blending
Once you have outlined your lips, the most critical step for a natural look is blending. An unblended line is a dead giveaway. The goal is to soften the line so there is no obvious start or end point. You want to create a gentle gradient of color that fades from the outer edge of your lips inward. This technique makes your lips look defined and full, not just outlined. Blending connects the liner with your natural lip color, creating a seamless transition that will later merge perfectly with your lipstick or gloss. It is the step that separates a professional-looking application from an amateur one.
You have several tools at your disposal for blending. A small, stiff lip brush is an excellent option. Use the brush to gently smudge the liner inward, pulling the color toward the center of your lips. If you do not have a lip brush, a cotton swab works well for softening the edges. You can also use your clean ring finger. The warmth from your finger helps to meld the product into your skin for a very soft, lived-in effect. Gently pat and smudge the line until it looks like a soft shadow rather than a distinct border. Take your time with this step, as it truly makes all the difference.
Filling In and Finishing Your Look
After you have perfected your blended outline, you can take your natural look a step further. Lightly feather the lip liner inward to fill in about a third of your lips from the outer corners. This creates a base for your lipstick and adds dimension. This technique, often called ‘shading,’ makes your lips appear fuller and more three-dimensional. It also helps your lip color last significantly longer. When your lipstick begins to wear off in the center from eating or drinking, you will not be left with a noticeable ring around your mouth. Instead, the faded liner will provide a soft wash of color.
Now you are ready for your final lip product. You can apply a lipstick, a tinted balm, or a gloss directly from the tube or with a lip brush for more precision. Choose a lipstick shade that is close to your liner color for the most natural effect. When you apply it, be sure to blend it seamlessly into the liner. The liner and lipstick should look like one cohesive color, not two separate products. A final touch could be a small dab of clear gloss or a slightly lighter lipstick shade right in the center of your bottom lip. This little trick catches the light and creates the illusion of a plumper, more pillowy pout.
Common Lip Liner Mistakes to Avoid
Achieving a natural lip liner look also means knowing what not to do. One of the most common errors is choosing a liner that is too dark. A high-contrast liner, especially from the 90s trend, can look very harsh and artificial unless executed with specific artistic intent. For an everyday natural look, stick to shades that closely mimic your own lip color. Another frequent misstep is drawing a single, severe line around the mouth. This creates a “coloring book” effect that is anything but subtle. Always remember to use light, short strokes for a softer and more controllable application.
Skipping the blending step is perhaps the biggest mistake of all. An unblended line will always look obvious. You must take the time to smudge and soften the edges to create that seamless transition into the lip. Similarly, overlining too dramatically can backfire. While a slight overline can enhance fullness, going too far outside your natural lip line often looks noticeable and messy. Focus on enhancing the shape you have rather than creating a completely new one. Finally, avoid using a dry, old pencil. A product that tugs and skips will never give you the smooth, natural finish you desire. Keep your pencils sharp and replace them when they become too hard to apply comfortably.
Conclusion
You now have the knowledge to transform your lip liner application. The key is to see lip liner not as a border, but as a tool for subtle enhancement. By selecting the right shade and formula, you create the foundation for a flawless look. Remember that a pencil one to two shades deeper than your natural lip color will always yield the most believable results. Proper lip preparation through exfoliation and hydration ensures a smooth canvas, preventing any patchiness and making the product glide on effortlessly. This simple prep work elevates your entire makeup application from good to great.
Mastering the technique of using light, feathery strokes and always, always blending are the skills that will set your look apart. A soft, diffused edge is the ultimate goal. Think of it as creating a soft shadow that gives your lips beautiful dimension and shape. By avoiding common mistakes like using a dark liner or skipping the blend, you ensure a sophisticated and modern finish. With these expert tips in your beauty routine, you can confidently use lip liner to define and perfect your pout every single day. Your lips will look naturally full, perfectly shaped, and beautifully enhanced.