
We thoroughly assess all products before recommending them. We may be compensated if you choose to buy through links on our site.
Question: How Do You Make Your Bottom Lashes Look Good With Mascara?
Answer: To make your bottom lashes look good with mascara, wipe excess product from the wand. Hold the brush vertically, using the tip to lightly coat lashes. A smaller wand and a smudge-proof or waterproof formula will help prevent clumps and transfer for a clean, defined look.
Making Your Lower Lashes Pop with Mascara
Many makeup lovers focus entirely on their top lashes. They curl them, prime them, and layer on mascara for maximum volume and length. The bottom lashes often become an afterthought, or worse, a source of frustration. You might skip them to avoid smudges or that spidery, overdone look. Knowing how to make your bottom lashes look good with mascara can completely change your makeup routine. It opens up your eyes, creates balance, and gives you a polished, wide-awake appearance that lasts all day. This skill separates a good makeup application from a great one.
Achieving beautiful bottom lashes is not about luck. It involves a specific set of techniques and product choices. We will look at some simple steps you can take to master this art. From preparing your under-eye area to selecting the ideal mascara formula, each detail matters. You will learn how to apply mascara with precision to avoid clumps and smearing. We will also cover how to fix common mistakes and keep your lashes looking perfect from morning to night. Get ready to embrace your lower lashes and enhance your entire look.
Best Mascaras 2026
Mascara
Have you ever felt paralyzed by choice when facing the seemingly endless aisle of mascaras.…
Prepare Your Under-Eye Area for a Flawless Finish
A perfect lower lash application begins long before you uncap your mascara. The skin beneath your eyes is delicate and prone to oiliness, which causes mascara to smudge and transfer. The first step is to create a clean, dry canvas. Start your makeup routine by applying your favorite eye cream, but give it ample time to absorb fully into the skin. Any residual product on the surface can break down your mascara. A light, hydrating formula is better than a heavy, greasy one for daytime wear.
Next, apply your concealer to cover any darkness and create a uniform base. After blending the concealer, you must set it with a translucent powder. Use a small, fluffy brush to gently press a light dusting of powder over the entire under-eye area, getting as close to the lash line as possible. This simple action creates a matte barrier. The barrier prevents oils from your skin and concealer from mixing with the mascara. It significantly reduces the risk of smudging and gives your makeup incredible staying power throughout the day. This preparation step is non-negotiable for anyone who struggles with raccoon eyes.
Related Article: Is Regular Mascara Better Than Waterproof?
Related Article: How Often Is It Ok to Wear Mascara?
Select the Right Mascara and Wand
Not all mascaras are created equal, especially when it comes to the lower lashes. The big, fluffy wands you love for building volume on your top lashes are often too bulky and messy for the delicate bottom row. They deposit too much product and can easily touch the skin, causing immediate smudges. Instead, look for mascaras specifically designed with smaller, thinner wands. These wands offer greater control and precision, allowing you to coat each tiny lash from root to tip without making a mess. A comb-like wand or a skinny plastic bristle brush can be exceptionally effective for definition.
The formula of your mascara is just as important as the wand. For bottom lashes, a waterproof or tubing mascara is your best friend. Waterproof formulas resist moisture from watery eyes and humidity, preventing smudges. Tubing mascaras are even better for some people. They form tiny, water-resistant “tubes” around each lash. These tubes do not smudge or flake but remove easily with just warm water and gentle pressure. This makes cleanup easy and protects the delicate under-eye skin. A lengthening formula often works better than a heavy volumizing one, as it defines lashes without adding bulk that can look clumpy.
Application Technique
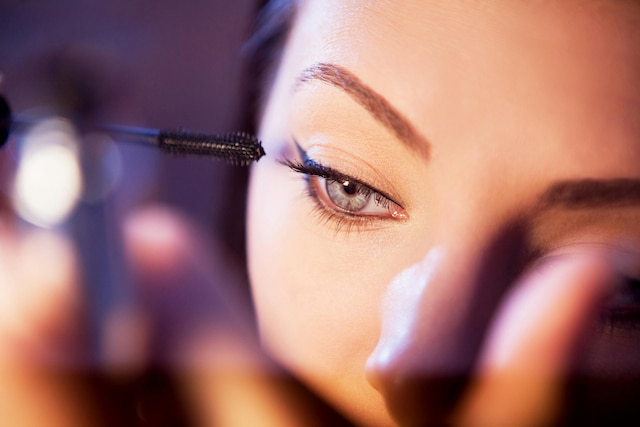
The way you apply mascara to your bottom lashes makes all the difference. Many people use the same horizontal wiggling motion they use for their top lashes, but this often leads to clumps and smudges. A better approach is to hold the mascara wand vertically. Use the very tip of the wand to gently touch and coat each individual lash or small sections of lashes at a time. This method provides ultimate control and ensures a light, even coat of product. It separates the lashes beautifully for a natural, feathery look rather than a thick, heavy one.
To prevent mascara from getting on your skin, you can use a simple shield. You can purchase a dedicated lash shield, or you can use a household item like a business card, a credit card, or even the curved edge of a teaspoon.
-
Position the Shield
Place the edge of your chosen shield directly underneath your lower lash line, pressing it gently against the skin. This creates a physical barrier between your lashes and your skin.
-
Apply Mascara Freely
With the shield in place, you can apply your mascara more confidently. Sweep the wand through your lashes from root to tip. Any excess product will land on the shield instead of your perfectly applied concealer.
-
Wipe and Repeat
Wipe the shield clean and repeat the process on the other eye. This trick is a game-changer for beginners and anyone who struggles with a shaky hand.
Correcting Common Mascara Mishaps
Even with the best preparation and technique, mistakes can happen. The key is knowing how to fix them without ruining your entire makeup look. If you get a small smudge of mascara on your under-eye area, do not wipe it immediately. Wiping wet mascara will only smear it and make the problem worse. Instead, let the mascara spot dry completely. This usually takes a minute or two. Once it is fully dry, take a clean, dry cotton swab and gently flick the spot away. The dried mascara will flake off without disturbing the makeup underneath.
Clumps are another common issue. If your lashes stick together or have little blobs of mascara on them, a clean spoolie brush is your best tool. After applying your mascara but before it dries, gently comb through your lower lashes with the clean spoolie. This separates the lashes and removes any excess product, leaving you with a defined and natural appearance. If you do not have a spare spoolie, you can also use a lash comb. Acting quickly is essential, as it is much harder to fix clumps once the mascara has set and hardened on your lashes.
Advanced Tricks for an Eye-Opening Effect
Once you have mastered the basics, you can try some advanced techniques to make your bottom lashes look even better. One popular trick among makeup artists is to use a different color of mascara on the bottom lashes. While black mascara on top creates drama, a brown mascara on the bottom can provide a softer, more natural-looking definition. This is especially effective for people with fair hair or those who want a more subtle daytime look. The brown shade defines the eyes without the harshness that black can sometimes create on the lower lash line.
Another professional tip is to use a lash primer. Just as you prime your face for foundation, a lash primer creates an ideal base for your mascara. A thin coat of primer can help thicken and separate your bottom lashes before you even apply color. This allows you to use less mascara to achieve your desired look, which further reduces the risk of clumping and smudging. Some primers are also fortified with conditioning ingredients that help keep your lashes healthy and strong over time. It is an extra step that delivers a noticeable improvement in the final result.
The Final Touch: Removal and Lash Care
Your bottom lash routine does not end until you have properly removed your makeup. The skin around your eyes is the thinnest on your body, so aggressive rubbing can lead to irritation and premature wrinkles. It can also cause your delicate lower lashes to fall out. To remove mascara gently, use a dedicated eye makeup remover. A bi-phase or oil-based remover is excellent for breaking down stubborn waterproof or tubing formulas. Apply the remover to a cotton pad and hold it over your closed eye for about 20 seconds. This gives the product time to dissolve the mascara.
After letting the pad sit, gently wipe downwards in the direction of your lash growth. Avoid any harsh side-to-side scrubbing motions. You can use a cotton swab dipped in remover to clean up any remaining residue along the lash line. Proper removal keeps your lashes healthy and prevents product buildup that can make future applications look clumpy. Taking these extra moments at the end of the day ensures your lashes remain full and healthy, providing a beautiful canvas for your makeup tomorrow. It is a crucial final step for long-term lash success.