
We thoroughly assess all products before recommending them. We may be compensated if you choose to buy through links on our site.
Question: How to Stain Lips for Beginners?
Answer: To stain lips for beginners, first exfoliate and moisturize your lips. Apply a few dots of stain to the center of your lips and quickly blend outwards with a fingertip before it dries. Blot with a tissue for a softer look or layer for more intensity.
Achieving the Perfect Stained Lip
You want that effortless, just-ate-a-popsicle wash of color on your lips. Lip stains offer a beautiful, lasting color that feels like you are wearing nothing at all. Unlike traditional lipsticks that sit on top of your skin, a lip stain temporarily tints your lips with pigment. This creates a smudge-proof, transfer-proof finish that lasts for hours. For anyone new to makeup, learning how to stain lips for beginners is a fantastic starting point. The application is forgiving, and the result is a naturally flushed look that enhances your features without feeling heavy or high-maintenance. It is the perfect choice for long days, special events, or any time you want reliable color without constant touch-ups.
Lip stains absorb into the top layers of your skin, which means they will not feather or bleed into fine lines. This unique quality makes them a superior option for achieving a clean, defined lip look with minimal effort. You can eat, drink, and go about your day with confidence, knowing your lip color remains intact and vibrant. The journey to a perfect pout starts with understanding this amazing product.

Best Lip Stain
Lip Stain
From gentle toning to intense color correction, these lip stains offer targeted solutions for blonde and highlighted hair...
Preparing Your Lips for Application
A smooth canvas is essential for a flawless lip stain application. You cannot apply stain over dry, flaky lips and expect a good result. The pigment will cling to dry patches, creating an uneven, splotchy appearance that is far from the chic look you desire. Proper preparation ensures the color goes on smoothly and wears evenly throughout the day. The first step is to exfoliate. This removes dead skin cells and creates a uniform surface for the stain to adhere to. You can use a gentle, store-bought lip scrub or create your own simple version at home.
A homemade scrub of brown sugar mixed with a little honey or coconut oil works wonderfully. Gently rub the mixture onto your lips in small circular motions for about thirty seconds, then rinse it off with warm water. Your lips will feel instantly softer and smoother, ready for the next step. This simple action makes a significant difference in the final look and feel of your stained lips.
Hydration is Key
After you exfoliate, you must hydrate your lips. Applying a nourishing lip balm restores moisture and keeps your lips comfortable. Choose a balm that is hydrating but not overly greasy or waxy. Apply a light layer and allow it to absorb for a few minutes. This step plumps your lips and prepares them for color. However, before you apply the stain, you must blot any excess balm with a tissue. Too much slip from the balm can prevent the stain from properly absorbing into your lips, which reduces its staying power. A quick, gentle blot leaves the perfect amount of moisture without creating a barrier against the pigment. This balance of exfoliation and hydration is the professional secret to achieving that coveted, long-lasting, and perfectly even lip stain every single time. It is a non-negotiable step for anyone who wants to master this technique.
Related Article: What Are the Disadvantages of Lip Stains?
Related Article: How Do You Take a Lip Stain Off?
Selecting the Right Lip Stain Formula
Lip stains come in several different formulas, and choosing the right one can make your first experience a success. Each type offers a unique finish and application experience, so understanding the differences helps you find your perfect match. Beginners often find certain types easier to work with than others. Your choice will influence the intensity of the color and the ease of application. Taking a moment to consider these options will help you achieve the exact look you want. The most common formulas are water-based, gel-based, and innovative peel-off tints. Each one interacts with your lips differently, providing distinct benefits. Learning how to stain lips for beginners means finding the product that feels most comfortable and intuitive for you to use. This personal preference is just as important as the color you select. Let us explore the main types you will find on the market today.
-
Water-Based Tints
These are the most traditional type of lip stain. They have a very thin, liquid consistency, similar to watercolor paint. Water-based tints provide a sheer, natural-looking wash of color that you can easily build up for more intensity. They absorb quickly and feel completely weightless on the lips. Because they are so fluid, you need a steady hand for application. A great tip for beginners is to apply the liquid to the center of your lips and use a fingertip to quickly blend it outwards before it dries. This creates a soft, diffused look. -
Gel Formulations
Gel stains offer a bit more control than their watery counterparts. They have a slightly thicker consistency, which makes them less likely to run or bleed outside your lip line during application. Gels often provide more vibrant pigmentation in a single swipe and can have a subtle, dewy finish. The doe-foot applicators included with most gel stains make a precise application much simpler for someone just starting. They glide on smoothly and give you more playtime to blend and perfect the color before they set completely. -
Peel-Off Tints
Peel-off lip stains are a fun and unique option. You apply a thick, colorful gel to your lips, let it dry for several minutes, and then peel it off to reveal a soft, long-lasting stain underneath. The process is entertaining, and the result is a beautifully uniform tint that lasts all day. This type is excellent for beginners because the application does not require perfect precision. As long as you cover your lips with the gel, the peel-off action will leave a consistent color behind. It is a foolproof way to get an even stain.
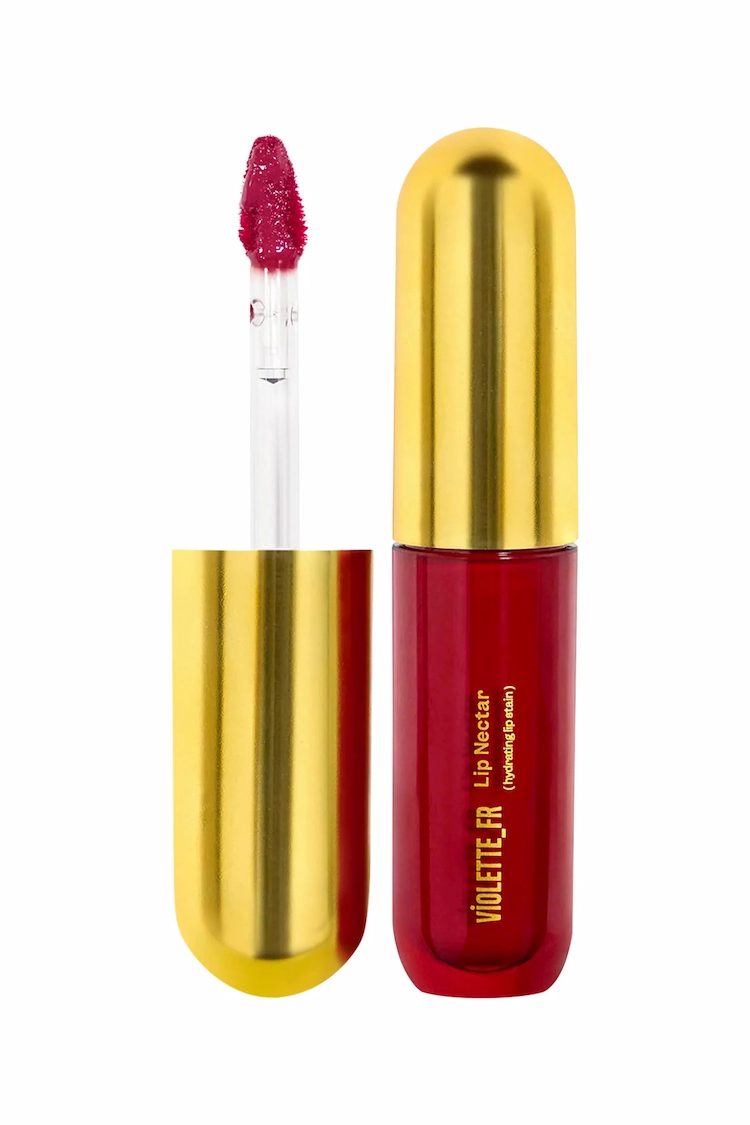
Violette_FR Lip Nectar Hydrating Lip Stain
Best Overall

Clarins Hydrating Water Lip Stain
Best Hydrating

Yves Saint Laurent The Inks Vinyl Cream
Best Shine
Mastering the Application Technique
The secret to a perfect lip stain is a quick and confident application. Because stains dry fast, you need to work efficiently to blend the color before it sets. Start with a small amount of product. It is always easier to add more color than to take it away. Most lip stains are highly pigmented, so a little goes a long way. For your first time, apply the stain to your bottom lip first. This allows you to see how the color develops and how quickly it dries on your skin.
Use the applicator to dot a few small specks of stain in the center of your bottom lip. Then, press your lips together to transfer some of the product to your top lip. This simple trick helps create a more natural and even distribution of color from the start. It prevents you from applying too much product to one area and gives you a beautiful, balanced base to work from. This initial step sets you up for a successful application and a gorgeous result.
Blending for a Natural Finish
After your initial application, blending is the most important step. You can use a few different tools for this. Using your ring finger is a popular method because the warmth of your skin helps to meld the product seamlessly into your lips. Gently tap and press the color from the center of your lips outwards towards the edges. This technique creates a soft, diffused look without any harsh lines. If you prefer a more defined shape, a small, synthetic lip brush offers more precision. A brush allows you to carefully guide the color right up to your lip line for a crisp, clean finish.
For a very soft effect, you can even use a clean cotton swab to blur the edges. Work quickly, as the stain will begin to set within a minute. Once the first layer is dry, you can assess the color and decide if you want to add another layer for more intensity. Layering is how you customize the stain from a sheer wash to a bold statement.
Creating Custom Lip Looks
Once you feel comfortable with a basic application, you can start experimenting with different techniques to create custom looks. A lip stain is an incredibly versatile product that allows for a lot of creativity. One of the most popular and flattering styles you can create is the gradient lip, also known as an ombré lip. This look features a deeper concentration of color in the center of the lips, which gradually fades out towards the edges. It creates the illusion of fuller, plumper lips and gives a youthful, romantic vibe.
The gradient technique is surprisingly easy to master and makes your makeup look very intentional and polished. This style is perfect for everyday wear, as it provides color and dimension without looking overly done. You can achieve this effect with just one lip stain or by combining two different shades for a more dramatic transition. It is a fantastic way to elevate your makeup skills and have more fun with your products.
The Effortless Gradient Lip
To create a gradient lip, start with bare, prepped lips. Apply a small amount of your chosen lip stain directly to the inner part of your top and bottom lips. Do not spread the product all the way to the outer corners. Focus the pigment right in the center where your lips naturally meet. Next, use your fingertip or a clean lip brush to gently tap and blend the color outwards. The key is to create a seamless fade, so the color should be most intense at the center and almost sheer at the edges.
You can also press your lips together a few times to help soften the blend. For an even softer look, you can apply a touch of concealer or foundation around the outer edges of your lips before you start. This erases your natural lip line and makes the gradient effect even more pronounced. Finish the look with a clear gloss on top for a juicy, high-shine finish, or leave it matte for a more subtle effect.
Maintaining and Removing Your Lip Stain
You have perfected your application, and your lips look amazing. Now, you want that beautiful color to last as long as possible. Lip stains are famous for their longevity, but a few simple tricks can extend their wear time even further. First, try to avoid oily or greasy foods when possible. Oil is the primary ingredient in many makeup removers for a reason; it breaks down long-wearing pigments. While you can certainly enjoy your meal, be mindful that foods with high oil content may cause the stain to fade a bit faster, especially in the center of your lips.
Another tip is to apply your stain in thin layers, allowing each layer to dry completely before adding the next. This helps the pigment set more effectively than applying one thick coat. Finally, once your stain is fully dry, you can apply a light layer of a non-oily lip balm over the top. This can provide a bit of hydration and a protective barrier without compromising the stain itself. These small habits will help you get the most out of your lip stain.
The Proper Removal Process
At the end of the day, proper removal is just as important as proper application. Because lip stains are designed to be durable, they can be stubborn to remove with a simple face wash or micellar water. Trying to scrub the color off with the wrong product can lead to irritated, dry lips. The best way to remove a lip stain is with an oil-based cleanser or a dedicated dual-phase makeup remover designed for long-wear lip and eye products. These formulas contain oils that effectively dissolve the pigments without requiring harsh rubbing.
To remove your stain, saturate a cotton pad with the remover. Press the pad firmly but gently against your lips and hold it there for about 30 seconds. This gives the remover time to break down the stain. After holding, gently wipe the color away. You should see most of the stain lift off easily. Repeat if necessary, then follow up with your regular cleanser and a nourishing lip balm to rehydrate your lips overnight.
Conclusion – How to Stain Lips for Beginners?
Learning how to stain lips for beginners opens up a new way to enjoy lip color. With its lasting power and natural finish, the lip stain is a valuable addition to any makeup routine. Remember to always start with smooth, hydrated lips for the best results. Choose a formula that feels right for you, and do not be afraid to practice your application. By mastering these simple techniques, you can achieve a beautiful, effortless pout that stays put all day long. Go ahead and embrace the simple elegance of a perfectly stained lip.